cadnano/
PyQt3D
2016-11-26Attachments:


PyQt3D
A development version of PyQt3D was released on November 1st, 2016.
In order to get this running, we need to build the latest versions of PyQt and SIP, as well as the PyQt3D package. Fortunately, Nick already did 99% of the work in building a script to do this. His latest version had some vestiges of a "--dev" flag that didn't quite work, so I adapted it to download the dev versions of PyQt and SIP. My updated version is provided here for reference. It is fragile and won't work as soon as the dev snapshot extensions have changed.
For the Qt and PyQt builds, I re-enabled some of the QML and Qt Quick stuff that Nick had disabled. It seems that several Qt3D examples use QML to quickly declare UI settings, so I thought it might be useful to have them ready to go in the near future.
Before we can even install PyQt3D, we need the python3 environment set up correctly. First, I had to uninstall all my local copies of Python3, per StackOverflow instructions. Next I used homebrew to install (and/or update) and link python3.
Finally, I was able to create a new virtualenv, and run the install_pyqt_from_src.py script from within that environment. Once the latest version of PyQt is built within the virtualenv, I just cd to the PyQt3D directory, run python3 configure.py and then make and make install. If all goes according to plan, we should be able to successfully call import PyQt5.Qt3DCore from within python3.
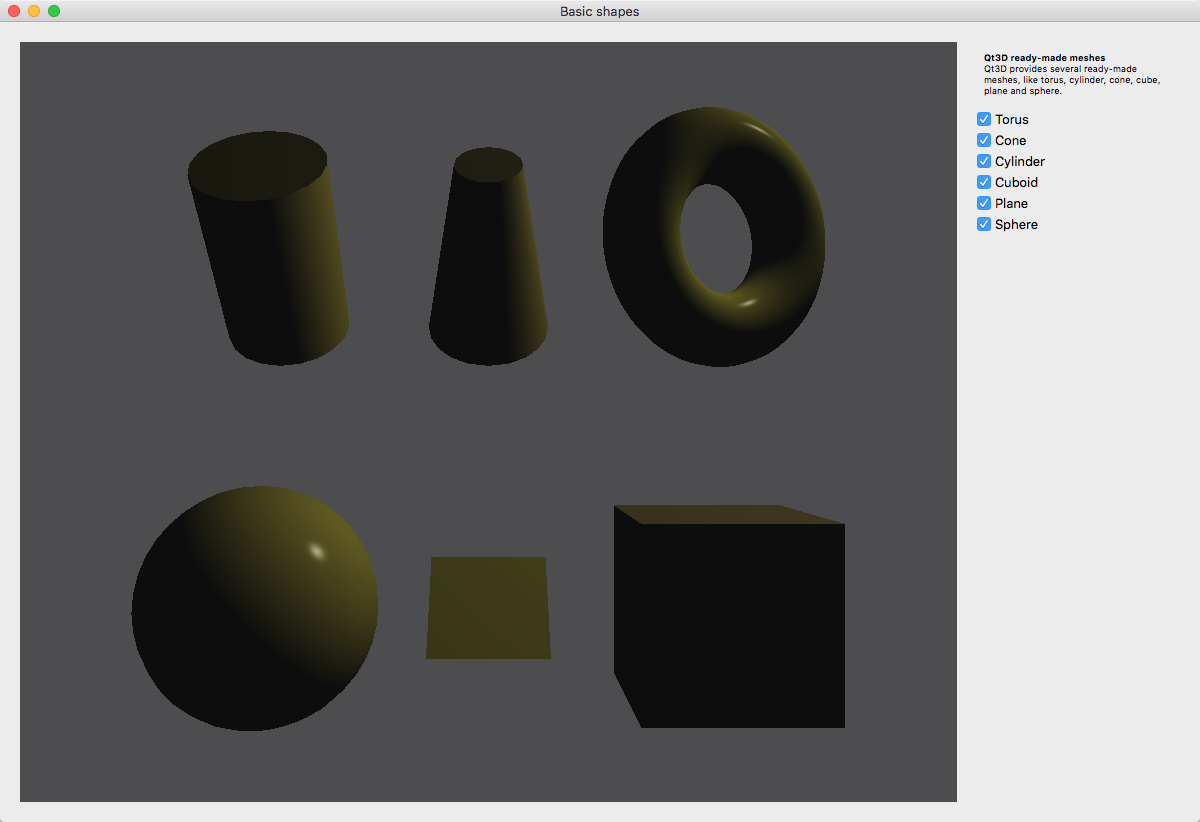
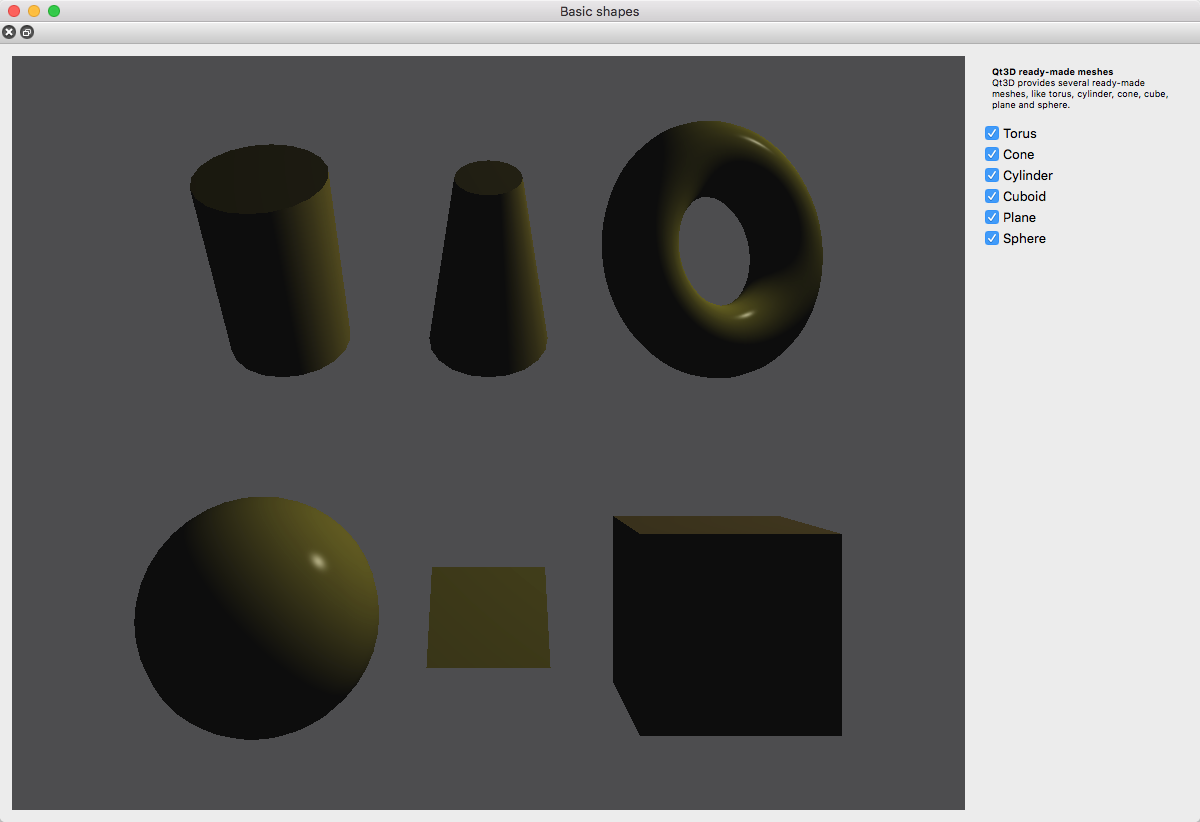
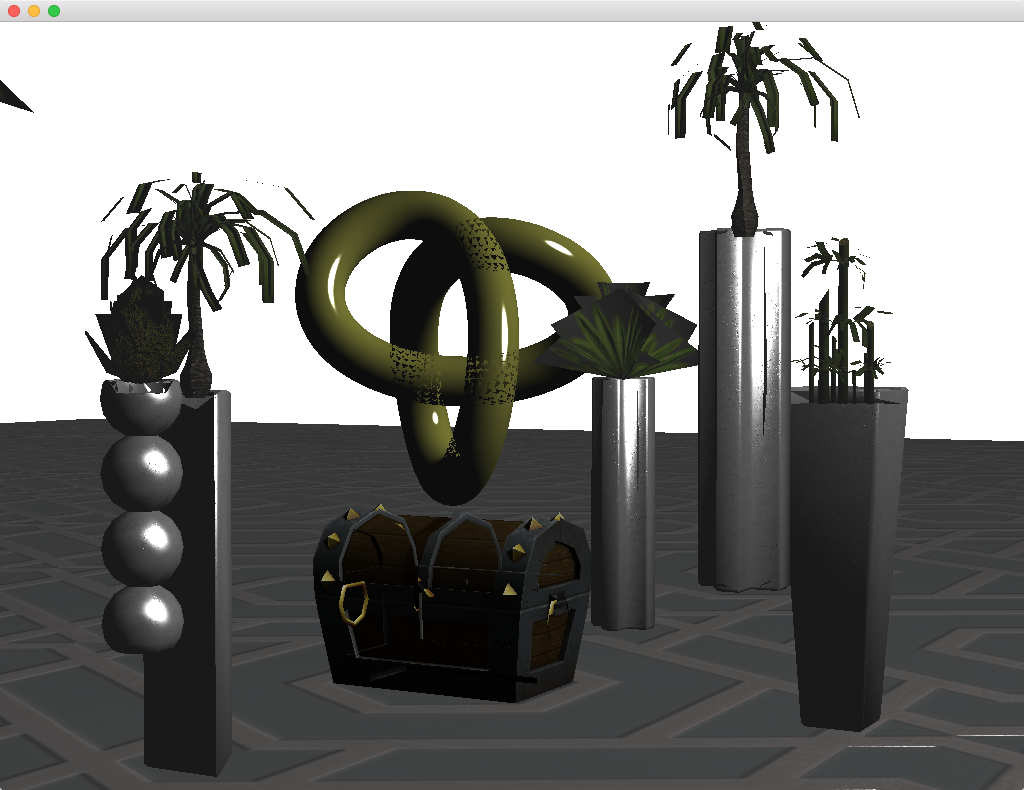
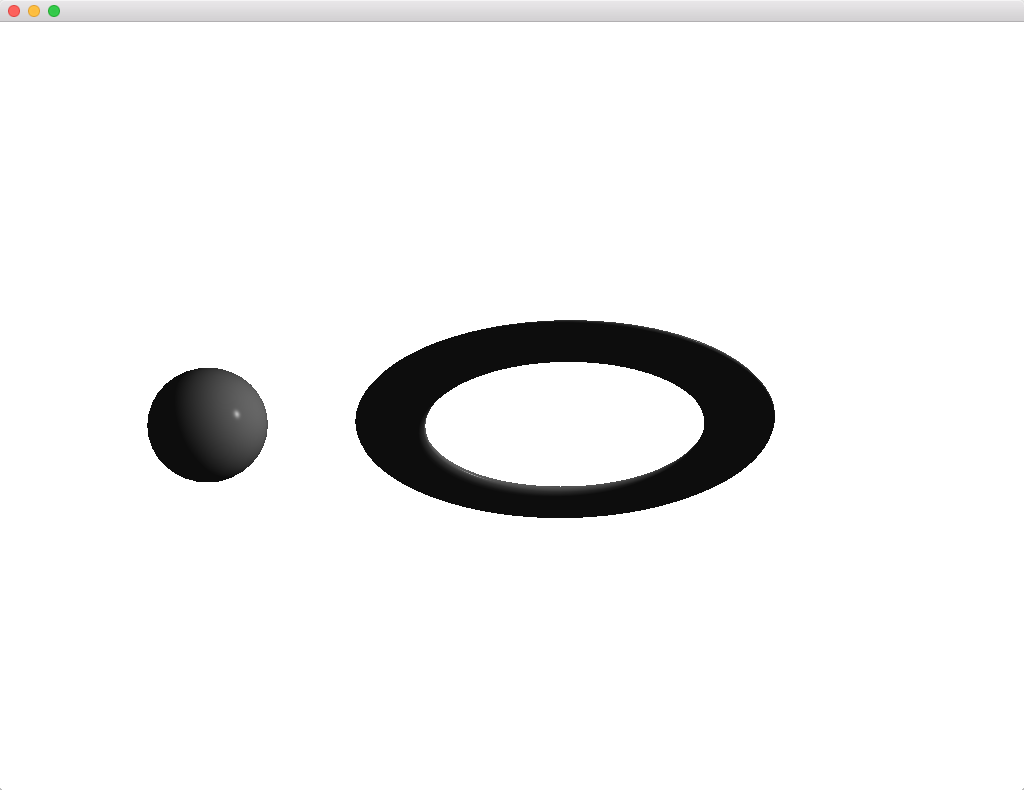
After installing PyQt3D successfully, I was able to run the included example scripts in the examples folder. Here are some screenshots of those scenes.


 |
| |
|:-:|:-:|
|basicshapes-cpp|basicshapes-py|
|
|:-:|:-:|
|basicshapes-cpp|basicshapes-py|
The coloring and lighting doesn't look that great for some reason. But it appears to be consistent with what you get when building and running the cpp examples from Qt Creator.
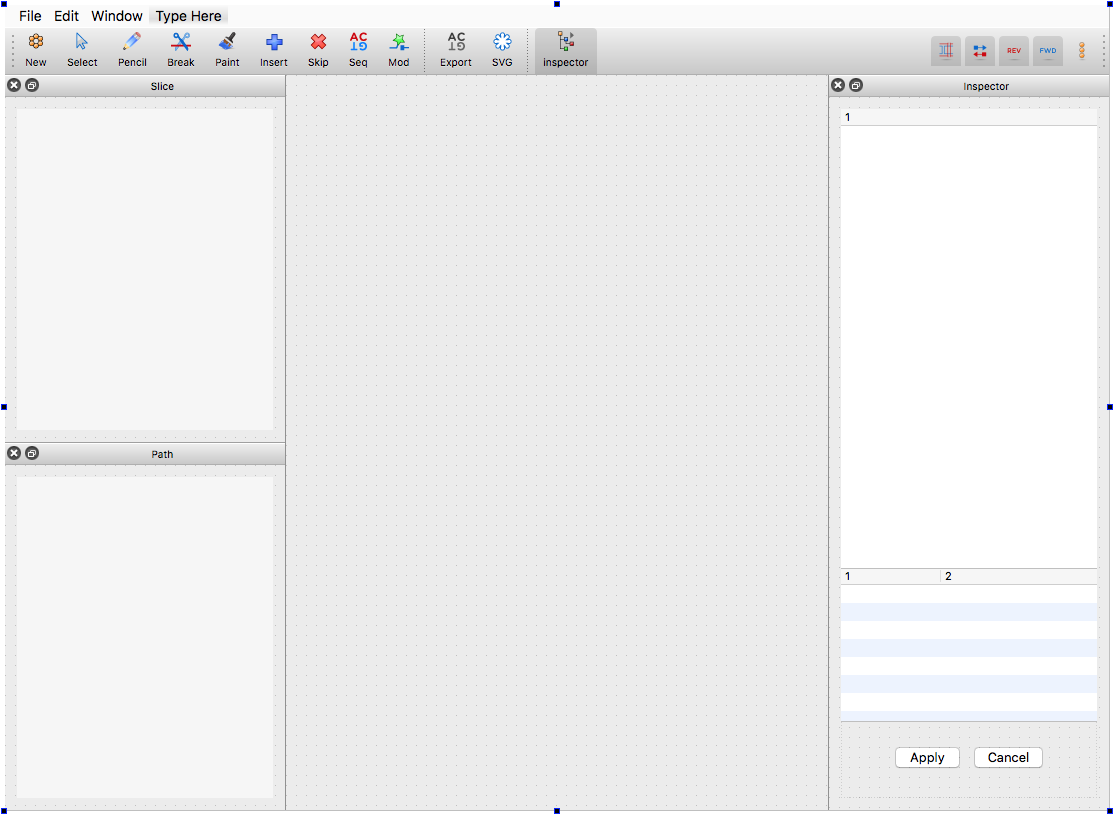
Updating MainWindow to use QDockWidgets
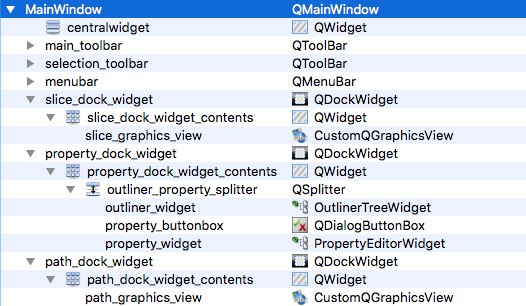
The main conversion here was done in Qt Creator. I removed the main_splitter, added some QDockWidgets. and then migrated views and view layouts inside them. If I recall correctly, the QDockWidget is supposed to have its own QWidget, so I created those (e.g. slice_dock_widget_contents) and then migrated the views into the contents widgets. This may be unnecessary, the views might work with the DockWidgets as direct parents.

New configuration of objects in QtCreator
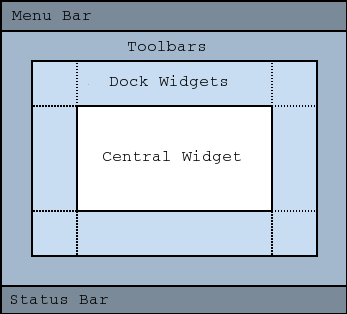
The goal here was to get flexible dock widgets that can be placed "anywhere" on the window. One thing that I had to understand about MainWindow is that it is organized around a "Central Widget" which is always in the center, and the dock areas, toolbars, and menu items are positioned in the surrounding areas. Thus, by default, dock widgets are confined to the dock regions surrounding the central widget.

Dock Widgets surround a central widget
The first thing I wanted to do is disable the centralWidget. My first approach was to delete the centralwidget Qidget in the .ui file. While it will build via pyuic and runs ok, this is not a good option because Qt Creator crashes when trying to open the edited ui file. Instead, I ended up disabling the central widget inside documentwindow.py by calling self.setCentralWidget(None). This must be called after setupUi so it is not overridden.
 |
| |
|:-:|:-:|
|Qt Creator|Runtime|
|
|:-:|:-:|
|Qt Creator|Runtime|
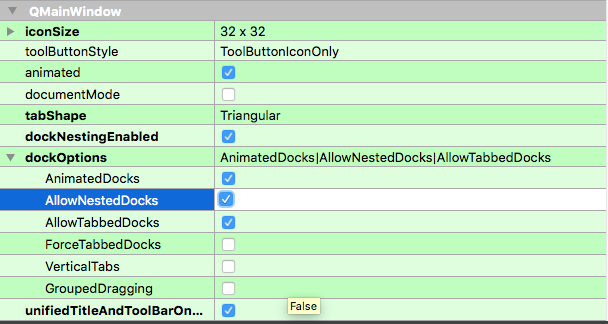
The next relevant property that can be used to add flexibility in dock positioning is to enable the AllowNestedDocks flag within the QMainWindow dockOptions. This allows docks to stack next to each other within the same dock area. Without nesting enabled, it seems that all dock widgets need to be touching the central widget with at least one corner, so you can't really stack them up in any configuration. The behavior is especially confusing when the central widget is not present.

AllowNestedDocks
The initial working version is shown here, corresponding to the commit 77659b5.
Future work in order to be suitable for release:
- The dock windows should be connected to actions to toggle them on or off. Right now you can close a dock widget and there is no way to get it back.
- Layouts should be saved in the user preferences file so a layout can be recovered between sessions. Centering of the scenes.
- Optional: default layouts might be saved to quickly switch between editing modes.
Adding a 3D view to cadnano
I opted to work with the basicshapes demo and try to port it inside the cadnano interface. The first problem I ran into was a segfault that occurred when I copied the demo code into a dock widget within cadnano. Nick actually figured out the issue, which was that I neglected to store references to the PyQt3D objects in class variables within the app. Adding self references solved the problem.
With the basic demo working within its own widget, I experimented a bit with the default lighting and shaders. I added 2 directional lights to the scene, and attached some QSliders to allow for updating their worlddirection vectors at runtime. I also re-ordered the code and changed the default shader colors to cadnano-style colors.

Next steps
Now that the basic view is working and geometry can be displayed, I plan to begin implementing nucleicacidpart and virtualhelix items within the solid view. Starting with the part item, I'll just display a semi-transparent cube to mark the 3D boundaries of the part. Next, as vh items are added to the part, a solidview virtualhelixitem class will maintain the cylinder geometry for strands within that item.
The default mouse interaction with the 3D window is completely weird and backwards. Rotation is opposite of the mouse direction, and I think orbiting should work with left mouse button, not right mouse button. We may need to write our own custom .cpp version of the QOrbitCameraController to rewire these aspects of the class.